Tag Archives: Recipe

Twinkie Cupcakes.

Standard

20130527-142900.jpg
This recipe for Twinkie cupcakes was modified from This Recipe.

The changes I made were twofold. I didn’t want to use the frosting, only modify the filling to work for both. Also, I remember a hint of lemon flavor in the originals, so I added where I thought proper. I think I’ve nailed it. Except, that 10 minutes after filling the cupcakes they are less pretty. Refrigeration would fix this, as would a proper frosting. Oh we’ll.

Cupcakes
1 box butter yellow cake mix, and the ingredients to make it
1 small box French vanilla fat free pudding
1 tsp lemon flavoring

Filling
1 (7 oz) jar marshmallow fluff
1/2 c room temp butter
1/2 tsp vanilla
2 cups powdered sugar
1/4 tsp salt dissolved into 2 Tbsp hot water (cooled)

Preheat oven to 350. Mix up the cake batter as called for on the box. Mix in pudding mix and lemon flavoring. Scoop into cupcake liners. Mine made 22 cupcakes.
Bake 15 – 18 mins until done. Let cool. With a slanted knife, cut a cone out of the middle.

20130527-143923.jpg
In mixing bowl, beat together fluff, butter, & vanilla until fluffy. Slowly add in sugar, alternating with water. I used about 1 Tbsp of the water.
Scoop filling into zip top bag (stand it up in a cup with the edges draped over. You’ll thank me later.), and put in the fridge for at least an hour. Snip the tip and pipe a swirl into each middle.
Enjoy!

20130527-144421.jpg

One Little Thing… Crockpot pork chops and gravy

Standard

I really love those days during the week that I am able to browse Pinterest for some really great recipes. I get so excited, and dive in head first. This is what happened the other day when I planned pork chops for supper with one such recipe.

However, I didn’t have any cream of chicken, and cream of mushroom is the go to… And I wanted something different. The result was so good, and easy.

The pork chops I used were bone in, but if I had to do it again, I would probably use boneless because the bones fell out anyway, and I had to hunt them all down… And some still ended up on plates! I have also changed up how it’s put together because the gravy was a little gloppy in parts, so mixing with water before its cooked fixes the issue.

20130505-092611.jpg

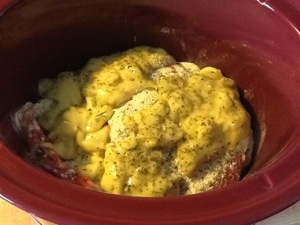
Pork chops, cream of celery, ranch mix, Italian seasoning. Crock pot. 3 hours. Yummy. bucketfulofcrazy.wordpress.com

4 pork chops
1 can cream of celery
1 packet of ranch mix
1 tsp Italian seasoning
1 cup water

Spray crock pot with non-stick spray, or place crock pot liner. Place pork chops on bottom of pot. In mixing bowl, mix ranch packet, Italian seasoning, cream of celery and 1/2 cup water. Pour over pork chops. Cook on high 3-4 hours.

Once pork chops are done, remove from pot, leaving as much gravy as possible. Some of the meat staying with the gravy is a good thing! Remove any bones at this point. Stir in 1/2 – 1 cup of water, whisk together to thin out gravy.

Everyone raved about this recipe, and I served it with mashed potatoes and corn. The gravy was awesome, especially with little bits of pork chop mixed in.

20130505-095501.jpg

These awesomely moist and tender pork chops tried to fall apart on me, but managed to mostly stay together long enough for me to get a pic! bucketfulofcrazy.wordpress.com

One Little Thing… Sweet Crescents

Standard

Yesterday I was in a breakfast mood that didn’t include a Slim Fast Shake or cereal. Again. I was really craving cinnamon buns but had none in the house. So I peeked in the fridge to see what I DID have, and came up with a brilliant idea.

(I haven’t checked Pinterest yet to see if it exists already, be right back! Nope!! Moving on.) I did this two ways in my experimenting. I took 1 package of crescent rolls and half were separated into the regular triangles, the other half was halved again to form 2 squares. The square ones had to go back in the oven a couple times, so I really prefer the regular crescent ones.

20130427-101130.jpg

These Sweet Crescents take 3 little things and turn them in to a whole whack of delicious!

Sweet Crescents

1 package crescent rolls

cinnamon (maybe 1 tsp total)

8 Tbsp leftover maple cream cheese frosting (recipe to follow)

Preheat oven to 375 (or as directed on crescent roll package).

Separate crescents and sprinkle with cinnamon.

20130427-101406.jpg

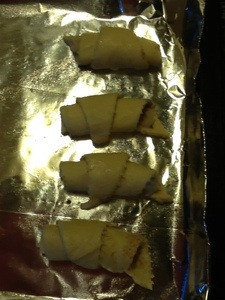
Unroll, sprinkle, squeeze, roll.
Easy peasy!

Squeeze about 1 Tbsp of frosting along big end of crescent.

20130427-101519.jpg

Rolled up and ready for a suntan.

Roll as normal.

Bake for 10 – 12 minutes.

Let cool (VERY IMPORTANT – those things are HOT!!!).

Enjoy.

20130427-101144.jpg

This, my friends, is 4 bits of goodness.
bucketfulofcrazy.wordpress.com

Also, I saved one for later and it was a little deflated but really very good. Like something from a pastry shop. SO good.

20130427-101646.jpg

This was one of the square pastries that didn’t make the cut. Sadly, it had to get eaten as punishment. bucketfulofcrazy.wordpress.com.

Maple Cream cheese Frosting

This is what I use on buttermilk cupcakes and top with bacon. I’m sure any other frosting would work too. Bet chocolate would be awesome! Oooh, or Nutella! Anyway…

1/2 C butter, softened

8 oz cream cheese, softened (I use 1/3 less fat and it is fine)

1-2 tsp maple flavor (near the vanillas)

4 C powdered sugar

milk as needed

Cream together butter and cream cheese. Add maple and sugar (in increments, otherwise you’ll wear it). Add 1 Tbsp of milk if needed for consistency.

I load mine into a gallon size zipper bag (held up by a big tumbler cup because it’s easy to spoon in that way), snip the tip and frost my cupcakes. I put the whole gallon bag into a smaller zip top bag to save any leftovers. This keeps quite a while in the fridge.

MPM, FTB, EGGs

Standard

It’s Monday, kids, time for this week’s menu plan! Normally I do this post while we’re watching Sunday night tv, but I was distracted by yarn. It’s a good thing, since it gave me the opportunity to try out Muffin Tin Omelets and Sunny Side Up Eggs. They’re still in the oven right now, but I’m sure that by the time this gets finished, I’ll have done pics!

Feed The Bay 2013

One of the drop off points for Feed The Bay.

First of all, I wanted to give an update on last weeks Feed The Bay. Together we were able to collect and distribute 160,050 pounds of food to local nearly 20 food banks and soup kitchens. This is enough to stock their shelves for 4-6 months! This is a whole lot of good after a week of a whole lot of bad. Even though the FTB event was before the Boston Marathon tragedy, hearing the total and seeing first hand what people can do to help one another was heart lifting. Lots of folks donate food to food banks through churches, schools, work, and event food drives at Thanksgiving time. FTB stocks them for nearly the rest of the year.

Secondly, the eggs are done and being eaten as I type. The omelet ones came out nice and fluffy, and apparently tasted good. (I don’t eat eggs, I get nauseated, usually, at the smell of cooking eggs!) Here is my recipe, and my notes on how to change it!

3 eggs + 2 Tbsp shredded cheese + 1 slice diced deli turkey = 4 mini omelets.  bucketfulofcrazy.wordpress.com.

3 eggs + 2 Tbsp shredded cheese + 1 slice diced deli turkey = 4 mini omelets.
bucketfulofcrazy.wordpress.com.

Omelet eggs (makes 4)

3 eggs

1 slice deli turkey diced/cut/sliced

2 T shredded cheese

Whisk up the eggs with a fork. add in turkey and cheese. Spoon out into 4 muffin tins.

Bake 350 for 20 minutes.

NOTES: my oldest said there was too much cheese in the omelets (I didn’t know that was possible!), but the little one loved them!

By using a big spoon, it was so much easier to get the egg mixture into the muffin cups. Pouring would have been very messy! bucketfulofcrazy.wordpress.com.

By using a big spoon, it was so much easier to get the egg mixture into the muffin cups. Pouring would have been very messy!
bucketfulofcrazy.wordpress.com.

The omelets were the perfect size. If I had done 4 eggs instead of 3, they would've poofed up above the tin and been very messy! bucketfulofcrazy.wordpress.com.

The omelets were the perfect size. If I had done 4 eggs instead of 3, they would’ve poofed up above the tin and been very messy!
bucketfulofcrazy.wordpress.com.

Sunny Side Up Eggs

Spray muffin tin with Pam.

Crack 1 egg into 1 muffin cup.

Bake 350 for 20 minutes.

NOTES: They were a little hard, with the yolk pretty but cooked through. My oldest liked them, but said that he prefers the yolks a little runny. Next time I would bake for less time, maybe 15 minutes, and see if they still jiggled a bit.

Muffin tin omelets and sunny side up.  bucketfulofcrazy.wordpress.com

Muffin tin omelets and sunny side up.
bucketfulofcrazy.wordpress.com

And Finally, my menu plan for this week!

Monday: Cheesy Baked Chicken – Kraft Fresh Take (I’ve had this on the plan for 3 weeks and haven’t been able to make it yet!! Today is the day!)

Tuesday: Crock Pot Beef Stew

Wednesday: Leftovers

Thursday: Grilled Cheese & Tomato Soup (Jake’s night to cook)

Friday: Rosemary Chicken & Potatoes

Saturday: Sloppy Joe Boats. I got the idea from a pin of this post, and I am going to use that as my idea to do my own thing.

Sunday: Pork Roast, Mashed Potatoes.

Planning my meals each week helps so much in the shopping, dining out, and “what’s for dinner Mama?” that I don’t know if I’ll ever not have one again!! You can play along too by creating your own Menu Plan and sharing it at OrgJunkie.com. See what others are up to this week: Menu Plan Monday 4/22. In the next couple days I will share my meal planning strategy. It’s easy, and a great way to weed out the meals that everyone doesn’t like.

Happy Earth Day.

Boston Cream Cake

Standard

Today is my in-laws anniversary. I wanted to make supper for them because they really do so much for us. I had quite a hard time deciding what to make, and I really did scour Pinterest for some ideas.
I decided to pull a Pesto Chicken Alfredo Pasta out of the freezer, and make a cake. The cake part was a challenge too. I have eleventy seven pounds of strawberries in my fridge and freezer right now now and thought about making something with them. However, my husband doesn’t like strawberries, so I looked around for plan b. I saw some Boston Cream cupcakes that whet my whistle, so I decided to make that, but a cheater cake version. I had all of the ingredients in my fridge, freezer, and pantry so we were good.

20130417-200517.jpg

Easy and delicious with ingredients you probably have on hand. Bucketfulofcrazy.wordpress.com.

Cake
1 box yellow cake mix
1 Tbsp vanilla
1/4 cup oil (or applesauce)
1 cup water

Filling
1 big (3.4 oz) vanilla pudding
1 cup milk
1 1/2 c thawed Cool Whip
1 Tbsp vanilla

Chocolate Glaze/Topping
1 ounce bakers chocolate (I bet cocoa powder would work too!)
1 ounce (about) semi sweet chocolate (I used mini morsels, about 1/4 cupish)
3 Tbsp milk
3/4 cup powdered sugar
1Tbsp butter

Directions
1. Make cake mostly to package directions, adding the extra vanilla. Pour into round cake pan. (Note #1)
2. Bake at 325 for about 40 minutes, or until its not jiggly anymore. Turn off the oven and let it sit for about 5 minutes. Remove cake to cooling rack (out of the pan) to cool.
3. Cut the cake in half (Note #2), and let sit on cooling rack separated until very cool.
4. Mix together filling ingredients. Let Sit At Least 5 Minutes or it will be pudding soup and not hold up. You can put it in the fridge to firm up a bit too.
5. Microwave chocolates and butter for 30 seconds and give a stir. Do another 20 seconds if needed.
6. Add milk and whisk until smooth. Slowly add powdered sugar, whisking often.
7. Put the bottom of the cake on a plate. Spoon pudding mixture to 1 inch inside the edge. Carefully place the top of the cake on pudding. Smoothly pour chocolate mixture on top, evenly moving for pretty coverage, go slow, and it won’t goo too much.

Both dinner and dessert were big hits. Yay!

Tips
#1. If you cut a strip of parchment about 3 inches wide and lay it inside the pan before baking, and spray it with Pam before adding the cake batter, it comes out really easily when you move it to the cooling rack. You could also make a perfect circle the same size as the cake pan, and it will come out too, but the strip is quicker to make and easier to lift.
#2. A couple feet of dental floss is the bet way to get a nice even cut . Simply wrap the floss around the cake where you want it cut, overlap the ends, and pull. Easy peasy.

Menu Plan Monday, and a binder peek!

Standard

Binder Peek!

I have been busily working to get my new binder into something resembling organized. I have many cute pen colors, highlighters, sticky notes… but I keep using the pink pen in the side loop. Kinda defeats the multi-pen purpose. Hrm.

My easy way to see what’s for dinner!
bucketfulofcrazy.wordpress.com

First I wanted to show off my ruler/page finder thing. I used the idea from Living The Good Life that I found on Pinterest to add my weekly menu on that ruler thing. BRILLIANT! When I was at Joann the other day, I found the $1 end cap in the scrapbook area and these adorable rub off letters and thought that would be perfect for my ruler to delineate the Days.

As a quick aside… I may be considered a crafty person, and some crafty things I am pretty good at. However, these had no instructions, so I had to wing it. I sucked at it, lost both of my Ts when I was trying to put the M on, so Tuesday is a U and Thursday is a R (which is what I usually use anyway). Sigh.

Next, I wanted to point out my chore tabs. These are from the Martha Stewart line at Staples. They are re-stick-able so when a chore is done for the week, I move it to the next week. That way I don’t have to write it over and over and it is really easy to see what I still have to do. For example, I have not yet cleaned either bathroom, scrubbed the kitchen counters, or mopped. (Moving on!)

As I get it more together, I will show it off more. I love it, it’s pretty, and I think it may be working. However, it is HUGE and heavy, and somewhat daunting. We’ll see how it goes.

Menu Plan Monday

Menu Plan Monday at orgjunkie.com

Menu Plan Monday at orgjunkie.com

Org Junkie is a site that I find myself pinning from quite frequently. I have many aspirations that started there… and since I think it’s a good idea to have SOME accountability, (and also… I’m a follower), I thought I’d join in the fun. Each Monday, she hosts Menu Plan Monday, a list of bloggers that are showing off what they plan to make that week for supper, often with links to the recipes. It is a great way to stalk see what others are making to give you ideas to steal make, too!

Here is my menu plan for this week (you can see it in my binder ^ up there!)

Monday: Cheesy Potato Beef Bake

Tuesday: Tuna Noodle Casserole – this was hubby’s request!

Wednesday: Crock Pot Cilantro Lime Chicken (from the cook day!)

Thursday: Chili – I use the Chili Magic brand with petit diced tomatoes. My 11 yr old is making this.

Friday: Steak and Twice Baked Potatoes

Saturday: Crock Pot Freezer BBQ Ribs (from cook day!) and Hash Brown Casserole

Sunday: Sunday Chicken

If you’d like to see the rest of those participating in today’s fun, visit Menu Plan Monday!

One Little Thing… Cook Day!

Standard

Planning a cook day

One of the things that I do when I’m on Pinterest is write down recipes that I find interesting. I write them on long strips of paper that are scraps, and if they are liked and I plan to make them again, I put them in my recipe binder on normal notebook paper. My scrap recipes don’t have to be pretty, or neat, they only have to tell me how to make what I want to make. Last week I gathered 6 of these recipes and decided to do a cook day.

These sites are the ones I chose from (with the recipes from each):

Over The Big Moon – Garlic Lime Chicken

Six Sisters Stuff – Maple Dijon (although I followed the ratios of Man Pleasing Chicken), Cilantro Lime Chicken, Beef Stew

McCormick Rosemary Chicken & Potatoes (I can not find where I found it on Pinterest, I tried!! I’ll give the recipe here. If it’s yours, please let me know so I can link properly!!)

Rosemary Chicken & Potatoes

1 pound boneless, skinless chicken breast, diced

1 lb potatoes, diced

1 package McCormick Rosemary Roasted Chicken with Potatoes (a spice card in the spice aisle!)

2 Tablespoons EVOO

*Mix all ingredients together until well coated. Freeze in gallon zipper bag. To cook: thaw bag, put ingredients in baking dish. Cook at 425 for 20-30 mins.

So in my planning, I wrote each recipe on a page in my little notebook – so I could keep track of any changes or notes for that recipe. On one page, I wrote how much of every ingredient that I needed. Then I poked around the kitchen, marked what I had, and made a list of what I needed.

Make a list and check it... eleven times.

Make a list and check it… eleven times.

As an Aside, Walmart does PRICE MATCHING! I spent some extra time noting what (I needed) was on sale and where, marked the flyer and page # on my list, and did most of the shopping there. I also went to ALDI because there is so much that I get there WAY cheaper than any sale price that Walmart will have.

Starting My Cook Day
After I dropped the boys off at school, I went to the stores and got my day started. It took extra time at the register to deal with the price matching, but I figure that I saved about $15, so I think it was worth it. I spent about $55 total for the cook day items that I needed.
When I got home, I put the meat packages in a cooler, washed my veggies, and took another look at my recipes. I went to label the bags with a sharpie and noticed that I only had 4 bags. No bueno!!

It is vital when starting your cook day that you make sure you have enough freezer zipper bags to store your food!

So another trip out to the Dollar General and I had a brand new box of 40 zipper bags, and an extra $4 to my bottom line. Whoopsy. However, it did give me a chance to get some tacos on the way home. Add another $4.28 to my bottom line. Willpower – not my middle name.

No Cooking on Cook Day
Mostly, cook day involves sorting, measuring, chopping, cleaning, smushing. There is no actual cooking. Well, not on this cook day. I wrote the name and directions on each bag with a Sharpie. For instance: “BBQ Ribs. Thaw. Low 6 hrs, Hi 3-4.” That way I know what it is and what to do with it. I’ve seen the fancy food labels that claim to stick to frozen zipper bags, but I’ve never had any success in this. I have also seen some brilliant people write the name of the meal on the side so you can see what it is when the door is opened. That is awesome!

Use Whatcha Got!

Use Whatcha Got!

Anywho, I started with the beef stew because it had the most chopped ingredients, and the more that is off my counter, the more room I have to work! So I put a bag on my cookie jar – sturdy, solid, wide mouthed, and it fit. Perfect! The stew beef that I was using for this was already frozen from a previous shopping day when I bought a hunk of beef and cubed it up into 2 meals worth of stew. I added the beef last, but if I did it again, I’d do that first. I chopped all of my veggies first, including the potatoes for the other recipe. Only wanted to chop once!

After that, I took one recipe at a time – one ingredient at a time. Put in the bag, put in the protein, put in each ingredient. Mush together. Lay flat, remove as much air as possible. Seal. Stack.

Pile of Done, the First

Pile of Done, the First

Freeze, Organize, List

If this is going to do anything for your grocery bill, you need to be able to use what you have. Keeping a detailed list of what is in your freezer is vital so you don’t over shop, and really helpful in creating a weekly menu plan. Menu plans stop the anxiety in the mornings about what to thaw for dinner, and severely limit our need to going out.

So make a list of the meals that you have on hand. I do it in the same manner that I do my freezer inventory, hash marks for available, x through when used. I will pin this sheet on my menu board with the freezer inventory.

Being organized is the only way to go!

Being organized is the only way to go!

In the end, I took about 4 – 5 hours including shopping to make 12 meals.

1: beef stew

2 each: Cilantro lime chicken, garlic lime chicken, rosemary chicken & potatoes, BBQ Ribs

3: Maple Dijon chicken

I still had some Italian marinaded chicken and 2 bags of Chicken Alfredo Pasta in there from last month. Now I have to make it a priority to use at least one or two of these a week!

It was a long day, and I actually finished by 5. I’m not sure how I’d do very much differently, except the forgotten bags, and doing better on my sales. I feel like it went pretty smoothly. A thing to note though, and it makes total sense! Some of the books that I got from the library says to do the cook days based on “Tray Sizes”, or “Reverse Planning”, meaning that you cook what is on sale, or for a Warehouse tray (big). It is a no-brainer! If you find boneless skinless chicken breast for $1.69, get 10 pounds and make 6 or 7 meals out of it. The goal is to make this as much about saving money as it is about convenience!

Let me know what your favorite freezer, crock pot, thrifty meals are!

House seasoning

Standard
20130319-135139.jpg

My version of House Seasoning – use it in place of plain salt & pepper in a recipe.

One of the staples of my kitchen is a variation of Paula Deen’s (http://www.pauladeen.com/recipes/recipe_view/house_seasoning/) recipe. I use it on and in nearly every recipe. For instance, right now I have chicken, seasoned with this, in a 350 oven for a recipe from Pinterest I’ll be trying later. (This one: http://www.amandathevirtuouswife.com/2012/12/pesto-chicken-alfredo-freezer-meal.html).

I used Paula’s recipe for House Seasoning for a long time, but found that I was constantly adding pepper, and sometimes garlic powder to everything I used it on.

My House Seasoning
1 cup salt
1/3 cup pepper
1/3 cup garlic powder

I keep this mixture in a Tupperware container in my pantry and use a shaker from an empty spice jar. I just fill the shaker whenever it gets low, and remake a batch when needed.

One little thing… Recipe binder

Image
binderbagRecipes

Holepunch a brown paper lunch bag for added storage in your binders.

In my household and recipe binders I have some hole-punched brown paper lunch bags to hold things that I’m not quite ready to file properly yet. This one is full of scraps of paper that I have jotted recipes on but haven’t tried yet. No sense putting forth actual effort if the family hates something (Calitots come to mind).

Today I am gathering up all of the loose bits of paper containing anything food-related and deciding if I am keeping it, tossing it, or wait-n-seeing it.

If I’m keeping it – I will write or type the recipe, or print it off from the source. Then holepunch it and file it in the appropriate place in my binder.

If I’m tossing it – then, um, I’ll toss it.

If I’m wait-n-seeing it – I’ll put in the Recipes to try bag and attempt to incorporate it into the menu planning. I try to add two new things each week – one main dish and one side dish or dessert. I don’t want to overwhelm the family, but I don’t want my Recipes To Try bag to be neglected either. There are so many wonderful recipes on the interweb and they will never become your favorite if you don’t make the effort to actually try them!!

Favorites that I’ve tried and loved:

Sandra Lee’s Salisbury Steak

Man Pleasing Chicken

Baked Tacos

Today, I’m trying this one: Crock Pot Scalloped Potatoes  (but 1/4 the recipe!). Fingers crossed!!

Muffin-Tin Oven Meatballs

Standard

I decided that I’d take a day to share a recipe that I’ve made, in the hopes that you will use my experience to make your meal time easier! In an upcoming One Little Thing, I will talk about the importance of having some Go-To meals that are quick and easy, not stressful, and delish. I’ll talk about meal planning, and how it makes your life easier, and bulk cooking which is awesome for when you don’t want to think about dinner.

Today my Mother In Law gave me 4 packages of ground beef that she got on a trip to the Commissary (at MacDill AFB). The Commissary does not believe in 1 lb packages of meat. I have NEVER seen a 1 lb package of meat there ever!! This morning, she gave me 2 pks out of the fridge, and 2 from the freezer. The frozen ones immediately went in my freezer, and I marked them on my Freezer Inventory (yet another future-post), the fridge ones wanted to be meatballs. I went to Pinterest (the new Google), and looked up Oven Meatballs.

I found some similarities in the recipes, and quite a few differences. SO I jotted down 2 of my faves, took what I liked, made up the rest, and viola! My recipe.

I love the idea of oven baking the meatballs, and I swear I thought I saw a pin somewhere that used muffin tins but I couldn’t find it. Sorry. That was my main goal – use my tin to make the meatballs. Also, I kinda wanted them to be good.

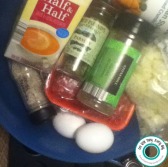
Meatball ingredients Pic

Here’s whatcha need:

mini-muffin tin

3 lbs Ground meat (I used 3.32 lbs of 10/90 ground beef – you can mix meats if you like)

1/4 cup diced onion

1 cup Italian bread crumbs

1 Tablespoon House Seasoning*

1 Tablespoon Italian Seasoning

1 teaspoon Parsley

1/4 cup half & half

Cooking Spray

Whatcha do:

Preheat oven to 400 degrees.

Ready to be mixed!

Ready to be mixed!

Mix up the ingredients except half & half until really well combined. Mix in half & half.

Scoop 'em up!

If you scoop all the meat, then roll at once, your hands don't get icky but one time.

If you scoop all the meat, then roll at once, your hands don’t get icky but one time.

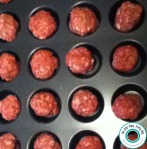
Scoop small amount of mixture and roll around to create a ball. Drop it into the muffin tin.  Spray with cooking spray. (I used 1/2 scoop of my cupcake scoop, dropped them all on a foil lined sheet and the rolled them all at once. Less dirty hands!)

Pre-heating...

Pre-heating…

Meatballs done.

Meatballs served!

Bake at 400 degrees for 15 minutes. Remove with tongs (twist & lift) to cooling rack over foil. Once cooled, they can be frozen in a single layer and stored in a gallon size zipper bag.

This made 67 meatballs. I tested one for ya, and it’s really good. I’m a giver like that!

* House Seasoning from Paula Deen: Mix up 1 cup salt with 1/4 cup pepper and 1/4 cup garlic powder and store in an airtight container. Store up to 6 months. I put mine in a repurposed spice shaker and keep it on my stove.